先列出需要的:ElasticSearch,ElasticSearch-head
一、ElasticSearch (新版ES自带jdk环境,如果你的环境中有jdk环境则优先,避免冲突还是建议使用1.9以上的吧!)
1、下载:elasticsearch(最新版本)
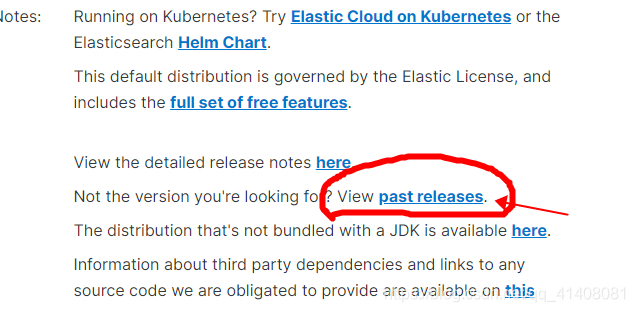
2、想下载旧版本的看图:

3、对应版本中文分词 ik 插件下载 :elasticsearch-analysis-ik (把包名改为ik并放到plugins下:elasticsearch-7.10.0pluginsik)
4、干货:本人下载的是:elasticsearch-7.10.0-linux-x86_64.tar.gz
使用xftp工具上传文件到服务器上/usr/local/elasticsearch-7.10.0-linux-x86_64.tar.gz
# 步骤1
tar –zxvf elasticsearch-7.10.0-linux-x86_64.tar.gz
# 步骤2 得到 elasticsearch-7.10.0 文件夹 并进入文件下
cd elasticsearch-7.10.0
# 步骤3  elasticsearch.yml 配置文件
vi /usr/local/elasticsearch-7.10.0/config/elasticsearch.yml
或者
vi config/elasticsearch.yml
修改配置:
#修改集群名称,同一个网段中elasticsearch会自动的找到具有相同cluster.name的elasticsearch服务
cluster.name: elasticsearch
#修改当前的es节点名称,与 cluster.initial_master_nodes: 对应
node.name: node-1
# 修改数据存储位置
path.data: /usr/local/elasticsearch-7.10.0/data
# 修改日志文件的路径
path.logs: /usr/local/elasticsearch-7.10.0/logs
#绑定的ip:默认只允许本机访问,修改为0.0.0.0后则可以远程访问
network.host: 0.0.0.0
#默认是被注释的 设置master节点列表 用逗号分隔
cluster.initial_master_nodes: ["node-1"]

#跨域
http.cors.enabled: true
http.cors.allow-origin: "*"
#限制内存使用
indices.fielddata.cache.size:  40%
indices.breaker.fielddata.limit: 60%
indices.breaker.request.limit: 40%
indices.breaker.total.limit: 70%

#( 我只添加了这三项
# indices.fielddata.cache.size:  30%
# indices.breaker.total.use_real_memory: false
# indices.breaker.fielddata.limit: 40%
#)
修改jvm参数:进入/usr/local/elasticsearch-7.10.0/config/jvm.options 文件:
# 在 elasticsearch-7.10.0 文件下
vi config/jvm.options
修改默认配置:-Xms1g -Xmx1g为:
-Xms256m
-Xmx256m
5、修改linux内核参数:修改/etc/security/limits.conf 文件 增加配置:
vi /etc/security/limits.conf添加如下内容:
* soft nofile 65536
* hard nofile 65536
* soft nproc 4096
* hard nproc 4096
6、修改虚拟内存空间:进入/etc/sysctl.conf文件,在文件最后添加一行 vm.max_map_count=262144添加完毕之后,执行命令: sysctl -p
vi /etc/sysctl.conf
# 在sysctl.conf 文件最后添加这行
vm.max_map_count=262144
# 按Esc键 -> Shift; -> wq -> 回车退出
# 执行刷新命令:
sysctl -p
7、ES不允许使用root操作es,需要添加用户
#添加esuser用户
adduser esuser
#给esuser用户赋予操作文件夹的权限
chown -R esuser:esuser /usr/local/elasticsearch-7.10.0/
或者
chgrp -R esuser /usr/local/elasticsearch-7.10.0/
chown -R esuser /usr/local/elasticsearch-7.10.0/
chmod 777 /usr/local/elasticsearch-7.10.0/

#切换到esuser用户,启动es
su esuser
启动:
# 会打印信息在终端 Ctrl+c停止服务
./bin/elasticsearch
# 后台启动 信息看log日志
./bin/elasticsearch -d
# 或后台运行
nohup /usr/local/elasticsearch-7.10.0/bin/elasticsearch &
# 查找ES进程
ps -ef | grep elastic
# 有没有es的进程:
ps aux | grep elasticsearch
# 杀掉ES进程
kill -9 xxxx(进程号)
# 重启ES
elasticsearch -d (常驻)二、ElasticSearch-head
下载:elasticsearch-head CSDN加速版:elasticsearch-head
1、安装node.js
# 上传到 /usr/local
tar –zxvf node-v14.16.0.tar.gz
# 进入解压后的文件里
cd node-v14.16.0

# node检测
node -v

# 修改 /etc/profile
vi /etc/profile
# 添加配置
export NODE_HOME=/usr/local/node-v14.16.0
export PATH=$PATH:$NODE_HOME/bin
export NODE_PATH=$NODE_HOME/lib/node_modules

#刷新 source /etc/profile
source /etc/profile

# node检测
node -v
2、将解压后的 elasticsearch-head 文件包上传到 、/usr/local 下,elasticsearch-head文件夹下我们需要下载安装npm管理软件包,这里我们用淘宝镜像源
npm config set registry https://registry.npm.taobao.org3、进入head文件中,执行 npm install -g grunt-cli安装grunt,运行服务
npm install -g grunt-cli
npm install -g grunt

# 运行
grunt server
可能出现的报错:下载后,运行grunt server会继续报错,按照报错信息进行安装:
>> Local Npm module "grunt-contrib-copy" not found. Is it installed?
>> Local Npm module "grunt-contrib-concat" not found. Is it installed?
>> Local Npm module "grunt-contrib-uglify" not found. Is it installed?
安装以上报错提示的包
npm install grunt-contrib-copy
npm install grunt-contrib-concat
npm install grunt-contrib-uglify
集群健康值: yellow 问题
Elasticsearch采用默认配置(5分片,1副本),但实际只部署了单节点集群。由于只有一个节点,因此群集无法放置副本,因此处于黄色状态。 elasticsearch 索引的默认配置如下:
index.number_of_shards:5
index.number_of_replicas:1
因此我们在只有一台机器的时候,新建索引时,要这么建立
PUT /索引名
{
  "settings":{
     "number_of_shards":1,
     "number_of_replicas":0
  }
}
寻寻觅觅又是一季,花开时节里又一春,百花争艳谁为春,繁华落尽甘寂寞!


评论 (0)